Getting Started
Note: OSB documentation has been moved! Please see latest documentation (covering both OSBv1 and OSBv2) at: https://docs.opensourcebrain.org
Welcome to Open Source Brain!
Quick Introduction to OSB
See the five minute introduction for an overview of the current functionality of OSB.
Explore the models on OSB
You can explore the models on OSB in multiple ways:
Frequently Asked Questions
Some frequently asked questions are answered here.
OSB Meetings
Find out about past and upcoming OSB meetings and workshops.
Contact us
We hope you'll find the information you require here, but if not, please get in touch.
Five Minute Introduction
Note: OSB documentation has been moved! Please see latest documentation (covering both OSBv1 and OSBv2) at: https://docs.opensourcebrain.org
Hello! Let's go through the basics of Open Source Brain (OSB), this will take only 5 minutes to read! (yes, it's that easy).
This is the help section of your home screen, feel free to come back here every time you are lost, most of the anwsers you'll ever need are here! From your home screen you can work with any project and model available in OSB or even create your own ones. To search for available projects you can click on the Explore OSB link in the top bar or use the search box.
But first things first, what is an OSB project?
An OSB project is a container of computational neuronal models, usually these models are directly linked to a publication, or they might all be grouped in a project by a specific technology. An OSB project is always linked to a GitHub repository which stores all the models available in the given project, so if you are already familiary with GitHub you're good to go, otherwise here you'll find all you need to know. OK, so inside an OSB project there can be many models, but how do I work with a specific one? Within OSB there is an online environment that will help you both explore, simulate, and work with models. Yes that's right, you won't have to leave your browser to explore or even to simulate a specific model! Every project has a main model as entry point, it could be the main network, or cell, etc. for the given project, to explore this model just click on the green button "Explore model" at the top right corner when inside a project. To explore every other model available click on the "More" button next to it.

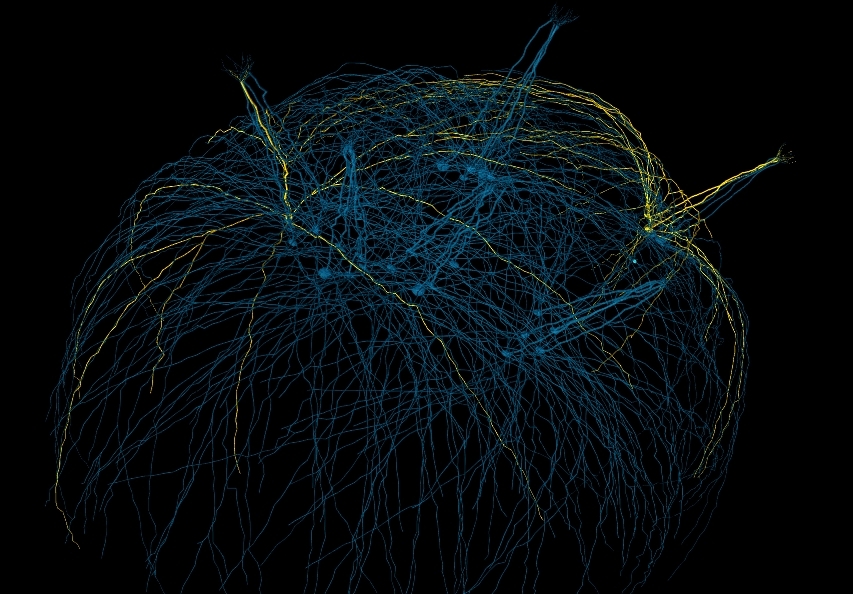
The model will load inside OSB, this might take between few seconds or up to a minute depending on the size of the model, you know how complex the brain can be right? You are looking at the model now and you are in read mode which means you can poke around and look at the content of the model but you can't run simulations...yet (keep reading!). So what can you do?
Pan and Zoom One of the most straightforward features is simple three-dimensional pan, zoom, and rotation functionality. This works both with the mouse as well as more precise control with the navigation buttons on the left hand panel.
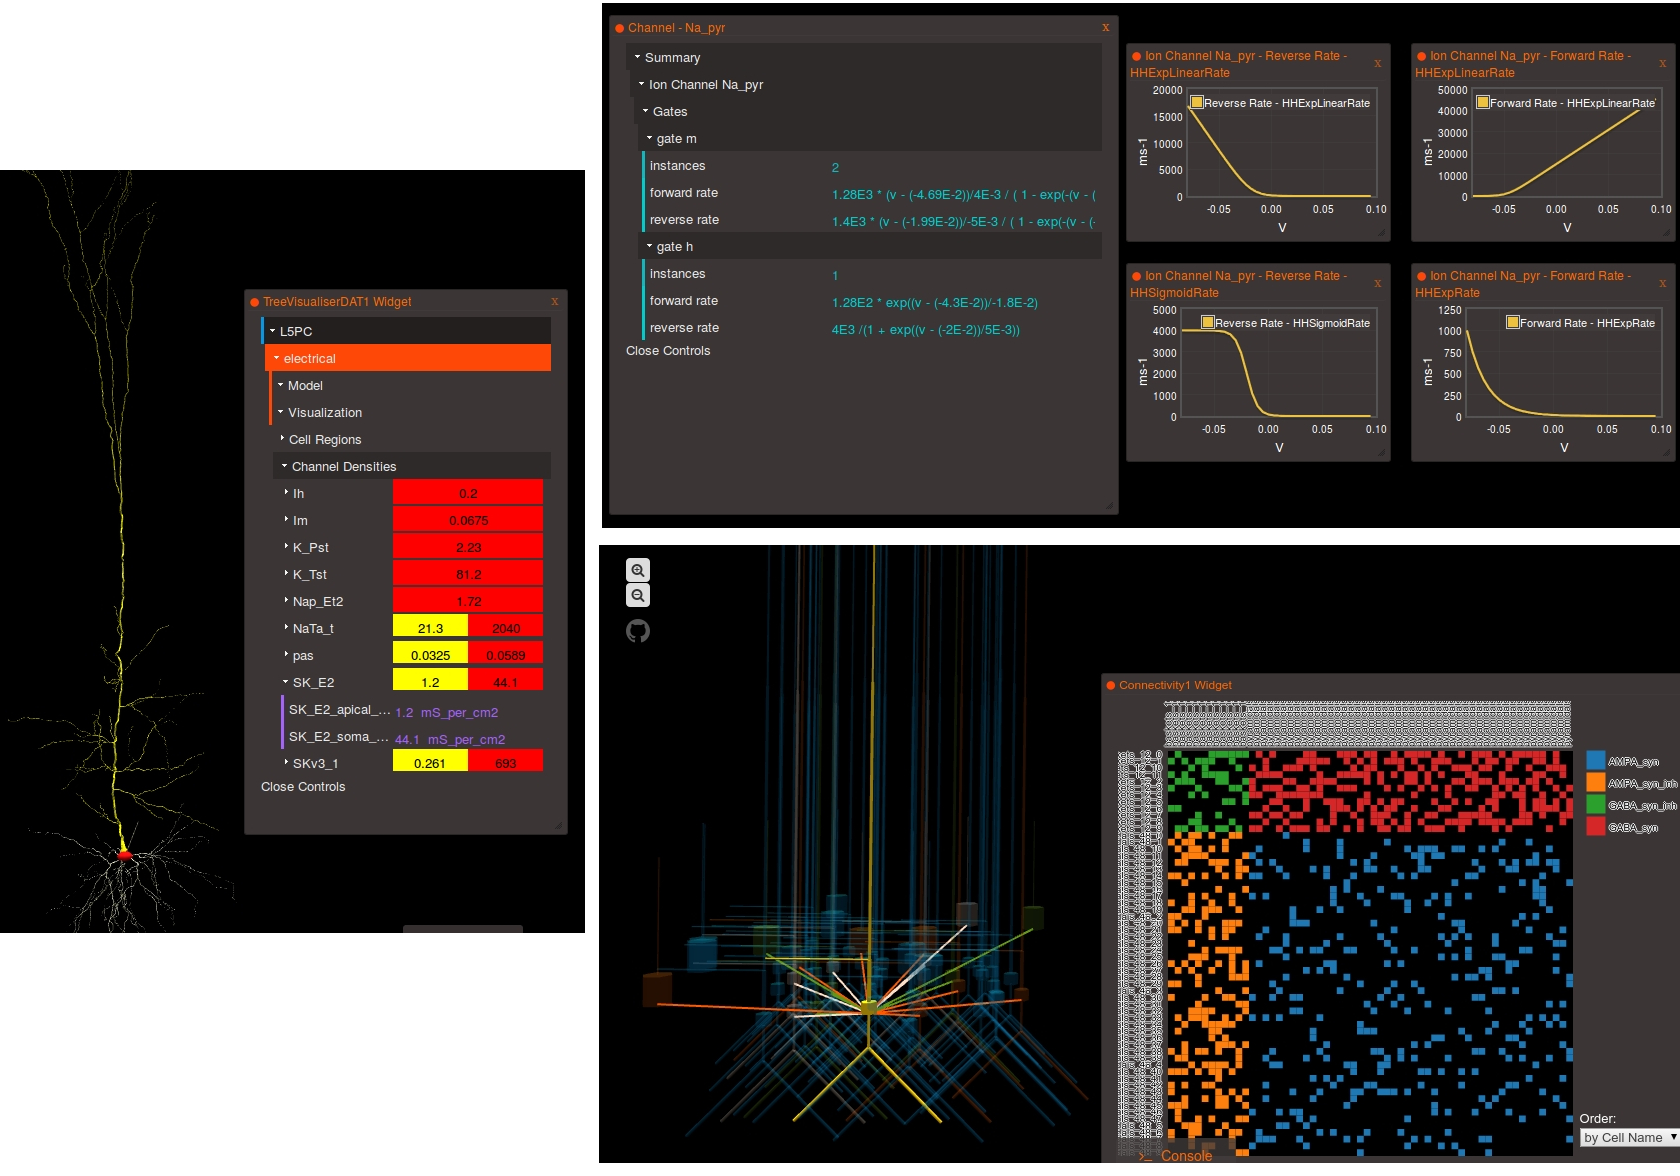
Explore the models Models in OpenSourceBrain have descriptions associated with them. You can access these descriptions by clicking on the “Model Description” button on the OSB toolbar.
Clicking on individual cells in the view will let you explore further descriptions of those cells, including any inputs or Ion channels. Clicking further into the model channels will enable you to see activation variable plots for those channels.

While you click through the cell descriptions, you can always go back to an earlier sheet using the history icon in the upper left hand corner of the information window.

Explore the network connections OSB has a variety of widgets built in to help you explore your models. Models like this one have a significant number of connections. By clicking on the “Connectivity” button, you can explore the connection patterns of your model using a variety of graphical tools.
What if you want to run a simulation? First of all you need to persist your model, this operation will create a snapshot of the model (a copy of whatever the latest is on GitHub) which is all yours and on which you'll have write access! Persisting the model is very simple, just click on the star icon on the top of the screen and wait few seconds (in order to do this, you’ll need to be logged in as a registered user of Open Source Brain).

The model is now persisted so you can work with it, let's have a look at the experiments! Experiments represent a particular configuration of your model, for each experiment you'll be able to decide which state variables you want to record, which values you want to give to the parameters of the model and even what simulator you'd like to use (do you know we are also connected to the San Diego Super Computer Center?), handy no?
Once you are logged in and the project is persisted, you can begin working with your model. You can create new experiments for your model by clicking the “clone” button. This will create a new experiment that is just like the one you cloned from. You can modify parameters on any experiment you like.

Recording variables Any state variable that exists in the model can be recorded prior to running a simulation, meaning it will be possible to subsequently plot its values once the simulation is complete. You can record a variable by searching for it in the search bar (open it using the little icon on the left hand side of the screen or pressing Ctrl+Space) and clicking on the Record icon . The icon signifying state variables that can be recorded is

Setting a parameter Any parameter in the model can be dynamically changed to see what the impact of different values will be. Prior to running an experiment you can modify the values by searching for the parameter name in the search bar and changing the value in the input box. The icon signifying a parameter name is

Run an experiment Once you are happy with what variables you will record and your experiment parameters, you can run the experiment. The Run button in the upper bar should be available to you. When you click it, the status of the experiment will change to show you both that it is queued for running and that it is completed. Playback results from a completed experiment
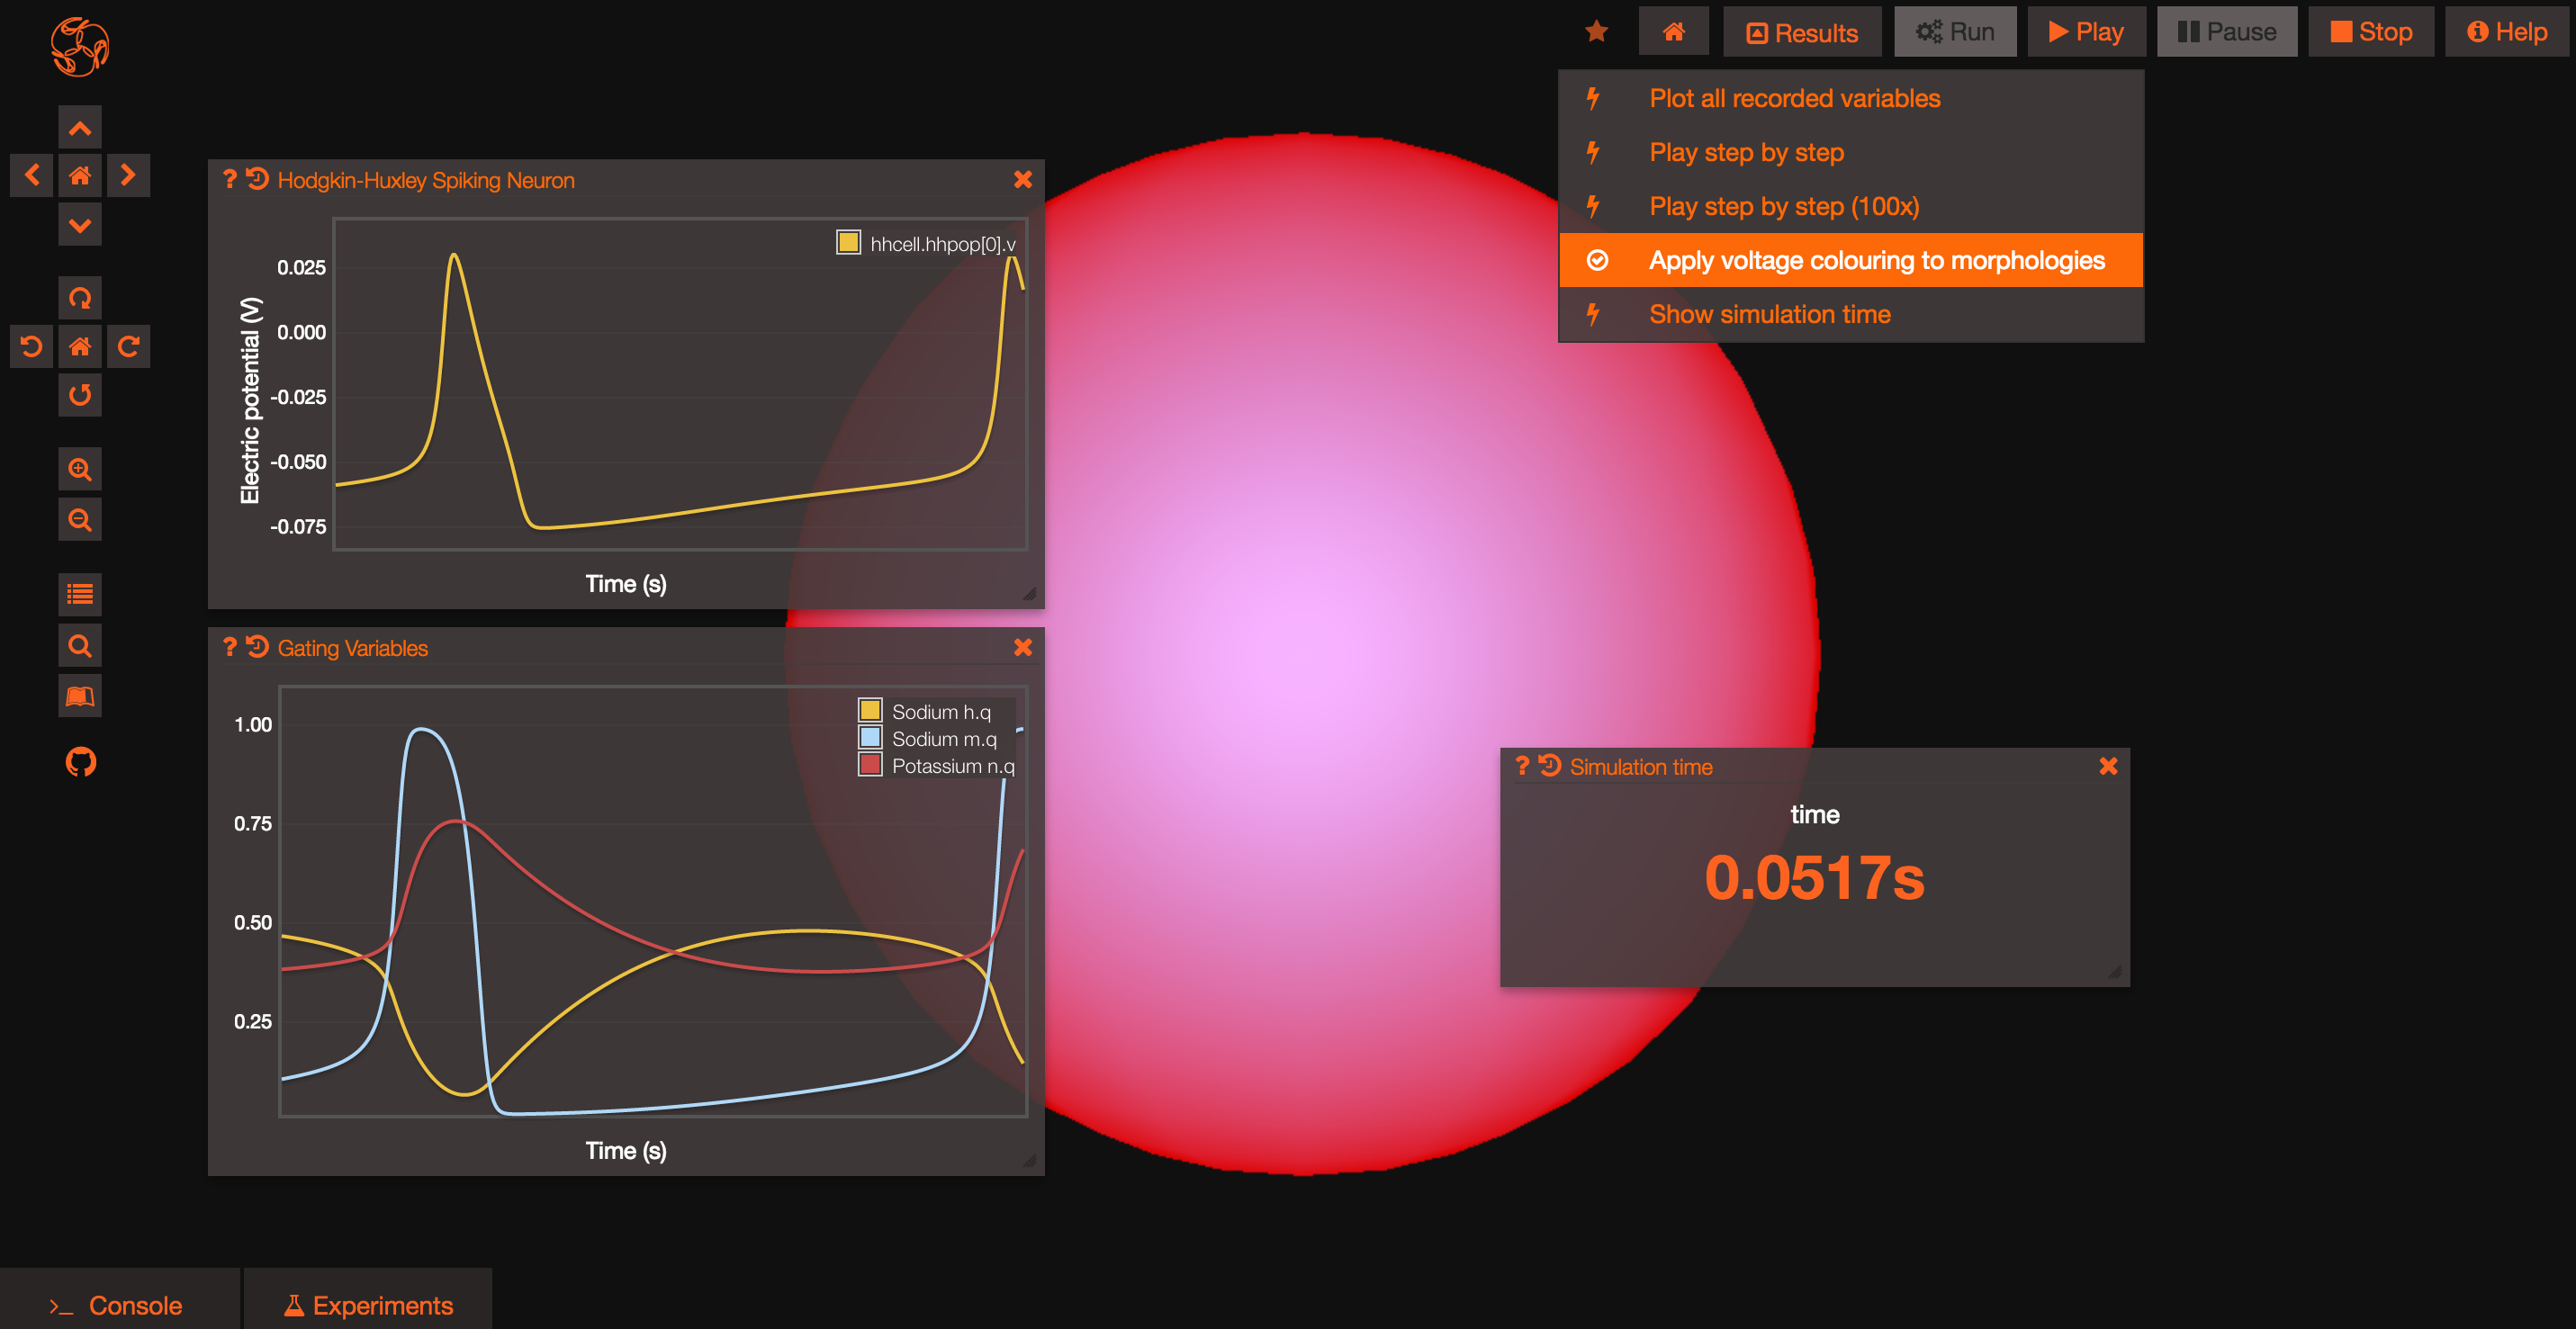
Once your experiment is finished, you can use the Play button to plot all the recorded variables that have been simulated.

If you want to plot a specific variable that you recorded you will be able to do so using the search bar to look for that variable and using the "Plot" icon. The list of all the variables recorded in a given experiment is available clicking on the "Recorded variables" link in the Experiment table.

Clicking on the Results button at the top of the screen will let you rapidly access some default actions, including the ability to see the cells for which you recorded the membrane potential spiking!
Congratulations, you should now be ready to start exploring the models in OSB and run your own simulations!
Now it's time to create your own project!
Creating Your Own Project
Note: OSB documentation has been moved! Please see latest documentation (covering both OSBv1 and OSBv2) at: https://docs.opensourcebrain.org
Is your model on ModelDB?
First of all, if the model is published, please submit the original scripts to ModelDB. This is the correct place for depositing models at the time of publication and should be the first port of call for anyone looking for scripts related to a publication in computational neuroscience.
Placing a model on OSB after submission to ModelDB is an indication that you wish to develop your (or other modellers’ publicly shared) models in an open source collaborative environment, to get help debugging/improving them, to convert them to simulator independent formats, and generally encourage wider reuse.
Sign up to OSB
Register as a user of OSB here. Add your GitHub username and ORCID ID if you have one.
You should also add the URL of your project, software or lab. In the latter case, if the PI is in agreement, we can add the group to the list of labs taking part in the OSB initiative. Please send a mail to info@opensourcebrain.org if you are interested in that.
Share your code
Create a new repository for your code on GitHub (see here if want to know more about Source Code technologies and Git/GitHub). See the introduction to creating a new repository on GitHub help.
The repository can be hosted on the OpenSourceBrain GitHub organisation, but there is no problem having it under your personal account. If you would like us to host the repository, let us know and we’ll add the repository and give your GitHub user full access to it.
Create a new OSB project
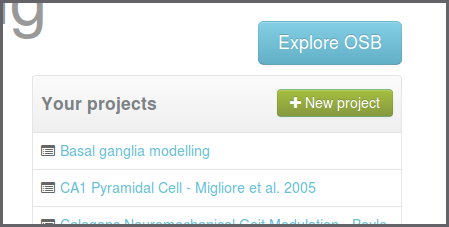
Go to http://www.opensourcebrain.org when you’re logged in. There should be a green button on the top right for adding a new project.
Enter the long name of the project (this can be edited later), the short ID (this can't be changed), a description of the project and the path to the GitHub repository. If the code is not on GitHub yet, or if you host it elsewhere leave this blank. The repository URL can be added manually at a later point.
Add some documentation
There is information here on adding documentation to your OSB project.
Say hello…
Now is a good time to drop us a line on info@opensourcebrain.org, and let us know your plans for what you’d like to get out of OSB. We’re always happy to hear from new users.
Write Your Project Documentation
Note: OSB documentation has been moved! Please see latest documentation (covering both OSBv1 and OSBv2) at: https://docs.opensourcebrain.org
There are two main options for adding documentation to an OSB project:
1) Add README files in your GitHub repository and point to these from the OSB project
2) Add Wiki pages on the OSB project
1) Add README files in your GitHub
Instead of adding Wiki pages on OSB as described below, you can simply use the Markdown format files in your GitHub repo (e.g. README.md) and point to these from an OSB Wiki page (or from the text field for the main project description in Settings) using:
github:README.md
For example this: https://github.com/OpenSourceBrain/ACnet2/blob/master/README.md is also used as the project description in the OSB project page here: http://www.opensourcebrain.org/projects/acnet2.
2) Adding Wiki pages to OSB projects
To add a new Wiki page to your OSB project click on the "Wiki" link on the project option bar (when logged in) and start editing the wiki page.
OSB documentation is written in Markdown format syntax, together with some further Redmine and OSB specific additions (see below for further information). Note Markdown allows you to include most HTML syntax (i.e. videos...). In order to be as compatible as possible with GitHub wikis, OSB uses GitHub Flavored Markdown. You can find a cheatsheet here.
We describe briefly below some OSB/Redmine features to enhance Wiki pages on OSB (these can also be used in the text field for the main project description in Settings).
Reference to a Repository file.
You can point to any file (markdown or plain text) in your GitHub or Bitbucket repository (the repository used in your project).
github:[path]
bitbucket:[path]
This will retrieve the file content and display it in the OSB wiki page. This allows a single file in your repo (e.g. the main README.md) to be the master copy of the documentation for your project, and to make that accessible to someone browsing the project on OSB.
Example:
github:help/readme.md
bitbucket:help.txt
Reference to PubMed publication:
pubmed:[publicationID]
Example:
pubmed:17442244
This syntax will generate a reference link like this (link only correctly rendered on OSB): Gleeson et al., 2007 and a bibliography section will be automatically generated at the bottom of the page.
Create a formula
You can write formulas in your documentation using the LaTeX syntax. You only need to enclose you formula like this:
{{latex(formula)}}
Example:
{{latex(x=\frac{-b\pm\sqrt{b2-4ac}}{2a})}}
This will automatically generate the following image using the google chart API:

Link to Wiki page
If you want to link to other Wiki page:
[[Wiki page]]
Link to an Issue
If you want to link to an issue in your project:
Issue #12
Issue #12
Link to a Commit
If you want to link to a commit in your repository:
commit:f30e13e43
Using neuroConstruct Based Projects
Note: OSB documentation has been moved! Please see latest documentation (covering both OSBv1 and OSBv2) at: https://docs.opensourcebrain.org
A number of the projects on the OSB are based on neuroConstruct projects (see here). neuroConstruct is used to import model elements in NeuroML (e.g. exported from a simulator or other application), can generate code for multiple simulators, and can export NeuroML in various formats.
Install the latest version of neuroConstruct
First, get the latest version of neuroConstruct. While there are binary installers available on the neuroConstruct download page, it's best to use the latest version of this application from GitHub, as this will most likely be the version in which the projects on OSB were last saved.
Get the latest version of Git (see here for more about Git). Detailed instructions for installing neuroConstruct from source can be found here.
Install your simulator(s) of choice
More details on the simulators supported by OSB can be found here.
Get a local copy of one of the neuroConstruct based projects
Check out a local copy of one of the projects, e.g. Cerebellar Granule Cell - Maex De Schutter 1998
git clone https://github.com/OpenSourceBrain/GranuleCell.git
Run neuroConstruct as outlined in the installation instructions.
Go to File, then Open Project…, go to the folder you installed the project in and select GranuleCell/neuroConstruct/GranuleCell.ncx.
Go to tab Generate and press Generate Cell Positions and Connections.
Go to tab Export and then the tab for your chosen simulator (e.g. NEURON), press Create XXX files, then Run XXX simulation.
For more details on the interaction of neuroConstruct with these simulators see here.
Get all neuroConstruct based projects on OSB
To clone all of the projects on OSB which contain neuroConstruct projects (and many others) use the checkOSB script in the osb subfolder of the neuroConstruct home directory:
cd osb
./checkOsb.sh -u (Linux/Mac)
checkOsb.bat -u  (Windows)
This will clone ~70 projects with ~20 containing neuroConstruct projects, which will be accessible under the File - Open Source Brain Project:

FAQ
Note: OSB documentation has been moved! Please see latest documentation (covering both OSBv1 and OSBv2) at: https://docs.opensourcebrain.org
What is the motivation behind the Open Source Brain repository?
There are an increasing number of detailed single neuron and network models from various brain regions becoming available which encapsulate the latest data on anatomical and electrophysiological properties of the systems being investigated (e.g. on ModelDB). These complex models take a long time to develop and are normally only available in one of many incompatible, simulator specific formats.
The Open Source Brain repository (OSB) is a public repository for detailed neuronal models in standardised formats, with curated, stable releases which will evolve in line with new experimental findings, the latest modelling paradigms and simulator technology development. Anyone can contribute to any of the models on OSB, either through fixing a bug, adding new features or improving documentation for published models.
While the models can be collaboratively developed in any simulator format, the ultimate aim is to get as much of the model as possible into simulator independent formats like NeuroML and PyNN to ensure modularity, accessibility, cross simulator portability and to enable in-browser visualisation, analysis and simulation.
Who’s behind OSB?
This project was started in the Silver Lab at UCL as part of a Wellcome Trust funded project to encourage collaborative development of models in computational neuroscience.
The Principal Investigator for the OSB project is Angus Silver and the core team at UCL consists of Padraig Gleeson (Project Manager) and Ankur Sinha. Special thanks to Matt Earnshaw, Matteo Cantarelli, Adrian Quintan, Boris Marin and Eugenio Piasini for their significant contributions to OSB while at UCL.
A number of international research groups and organizations are currently involved in the Open Source Brain Initiative. See here for more details.
How is this related to other neuroinformatics initiatives?
We are very keen to have close links with other databases and repositories for neuroinformatics and computational neuroscience. Many of these will be enabled through common use of NeuroML, as is used by NeuroMorpho.org, and a number of other tools and resources. NeuralEnsemble hosts a number of software tools which will play a key part in simulating and analysing the models in the OSB.
We are also planning deep links to databases such as ModelDB for original model scripts and NIF/NeuroLex for definitions of model components.
See here for more details on interactions with other Neuroinformatics resources.
A number of the contributors to this initiative are involved with the various national nodes of the INCF.
What types of models can be developed?
Models of information processing in the nervous system are created at many levels, from high level models of cognitive processes and consciousness to low level models of signal transduction at synapses. In the short to medium term OSB will focus on spiking neuron models, i.e. networks of individual neurons which communicate through sending events to synapses on target cells. The core set of models currently under development in the OSB are conductance based models of (often multicompartmental) neurons. This class of neuronal model is particularly suited to collaborative development, as models of channels and synapses, or whole cell models, are often reused between studies, and the models themselves are complex software entities. The focus of NeuroML v1.x was on this type of model, but with version 2.0, support has been extended to more abstract neuron models (e.g. leaky integrate and fire, adaptive threshold models).
While converting the model components to NeuroML will be a key step towards increasing model transparency and accessibility and making them available for use on multiple simulators, other cross platform technologies will be used to assist model portability. Python is a scripting language commonly used in computational neuroscience and has been adopted by a number of the target simulators for OSB models. PyNN is a Python package for simulator independent specification of neuronal network models, and will be useful for procedural specification of complex network structures. The Simulation Experiment Description Markup Language (SED-ML) will be used for specifying settings for running simulations of the models. Mappings of the model components in OSB to other structured languages in computational biology will be supported too where appropriate, such as SBML, CellML and NineML.
My model’s only available in simulator X, not NeuroML/PyNN. Can I still share it on OSB?
Yes! If the model is already published, please submit to ModelDB first. On OSB we are happy to point to public repositories with the latest version of the code in any format, and have a link to the version on ModelDB. However, some of the advanced features of OSB will only be available if (parts of) the model are converted to NeuroML.
If your model is not yet published but it still public (we salute you; you are the future) we’re very happy to have it, but would ask that you make sure the versions used in publications are archived in ModelDB.
Do I have to be registered for accessing OSB projects and tools?
No. You can browse the OSB projects and use most of the OSB tools. However, if you would like to create your own project you should sign up. Also, the new functionality for executing and replaying your own simulations through the OSB interface is only available for logged in users.
What is the licence/terms of use for models on OSB?
Since all the scripts for models on OSB reside in autonomous repositories (e.g. on GitHub), each repository can (and should...) contain its own licence information. Unfortunately this is not the case for most of the repositories on OSB (which is a more widespread problem in scientific software development). Nevertheless, the clue is in the title... a user placing a model on Open Source Brain is probably keen to have it used and reused widely. If in doubt though and you want to be sure, open an issue on the repository in question (or mail info@opensourcebrain.org) requesting licence info be added to the repository.
Don't forget the golden rule however (more important to scientists than software licences...): if you use a model, please cite the original publication which describes the model. If there are significant changes in the OSB repo from the original model which you want to cite, we can generate a DOI/reference for a specific version of the model (e.g. here).
How can I contribute?
We are happy to hear from anyone interested in helping out with this initiative. We are particularly keen to get modellers or software developers in computational neuroscience involved.
Note: There is a central list for projects in OSB (and related NeuroML tools) which require help from volunteers. See here.
Find out about all the ways to follow the project or get in contact here.
Meetings
Note: OSB documentation has been moved! Please see latest documentation (covering both OSBv1 and OSBv2) at: https://docs.opensourcebrain.org


A number of meetings/workshops/hackathons have been organised and are planned to promote OSB and related technologies, including:
- NWB Explorer/OSB sessions at the 9th Neurodata Without Borders User Days Workshop, September 21-23, 2020
- A workshop at the online CNS*2020 on Tools and resources for developing and sharing models in computational neuroscience.
- NWB Explorer/OSB sessions at the 8th Neurodata Without Borders User Days Workshop, May 12-15, 2020
- OSB 2019 in Sardinia in September 2019
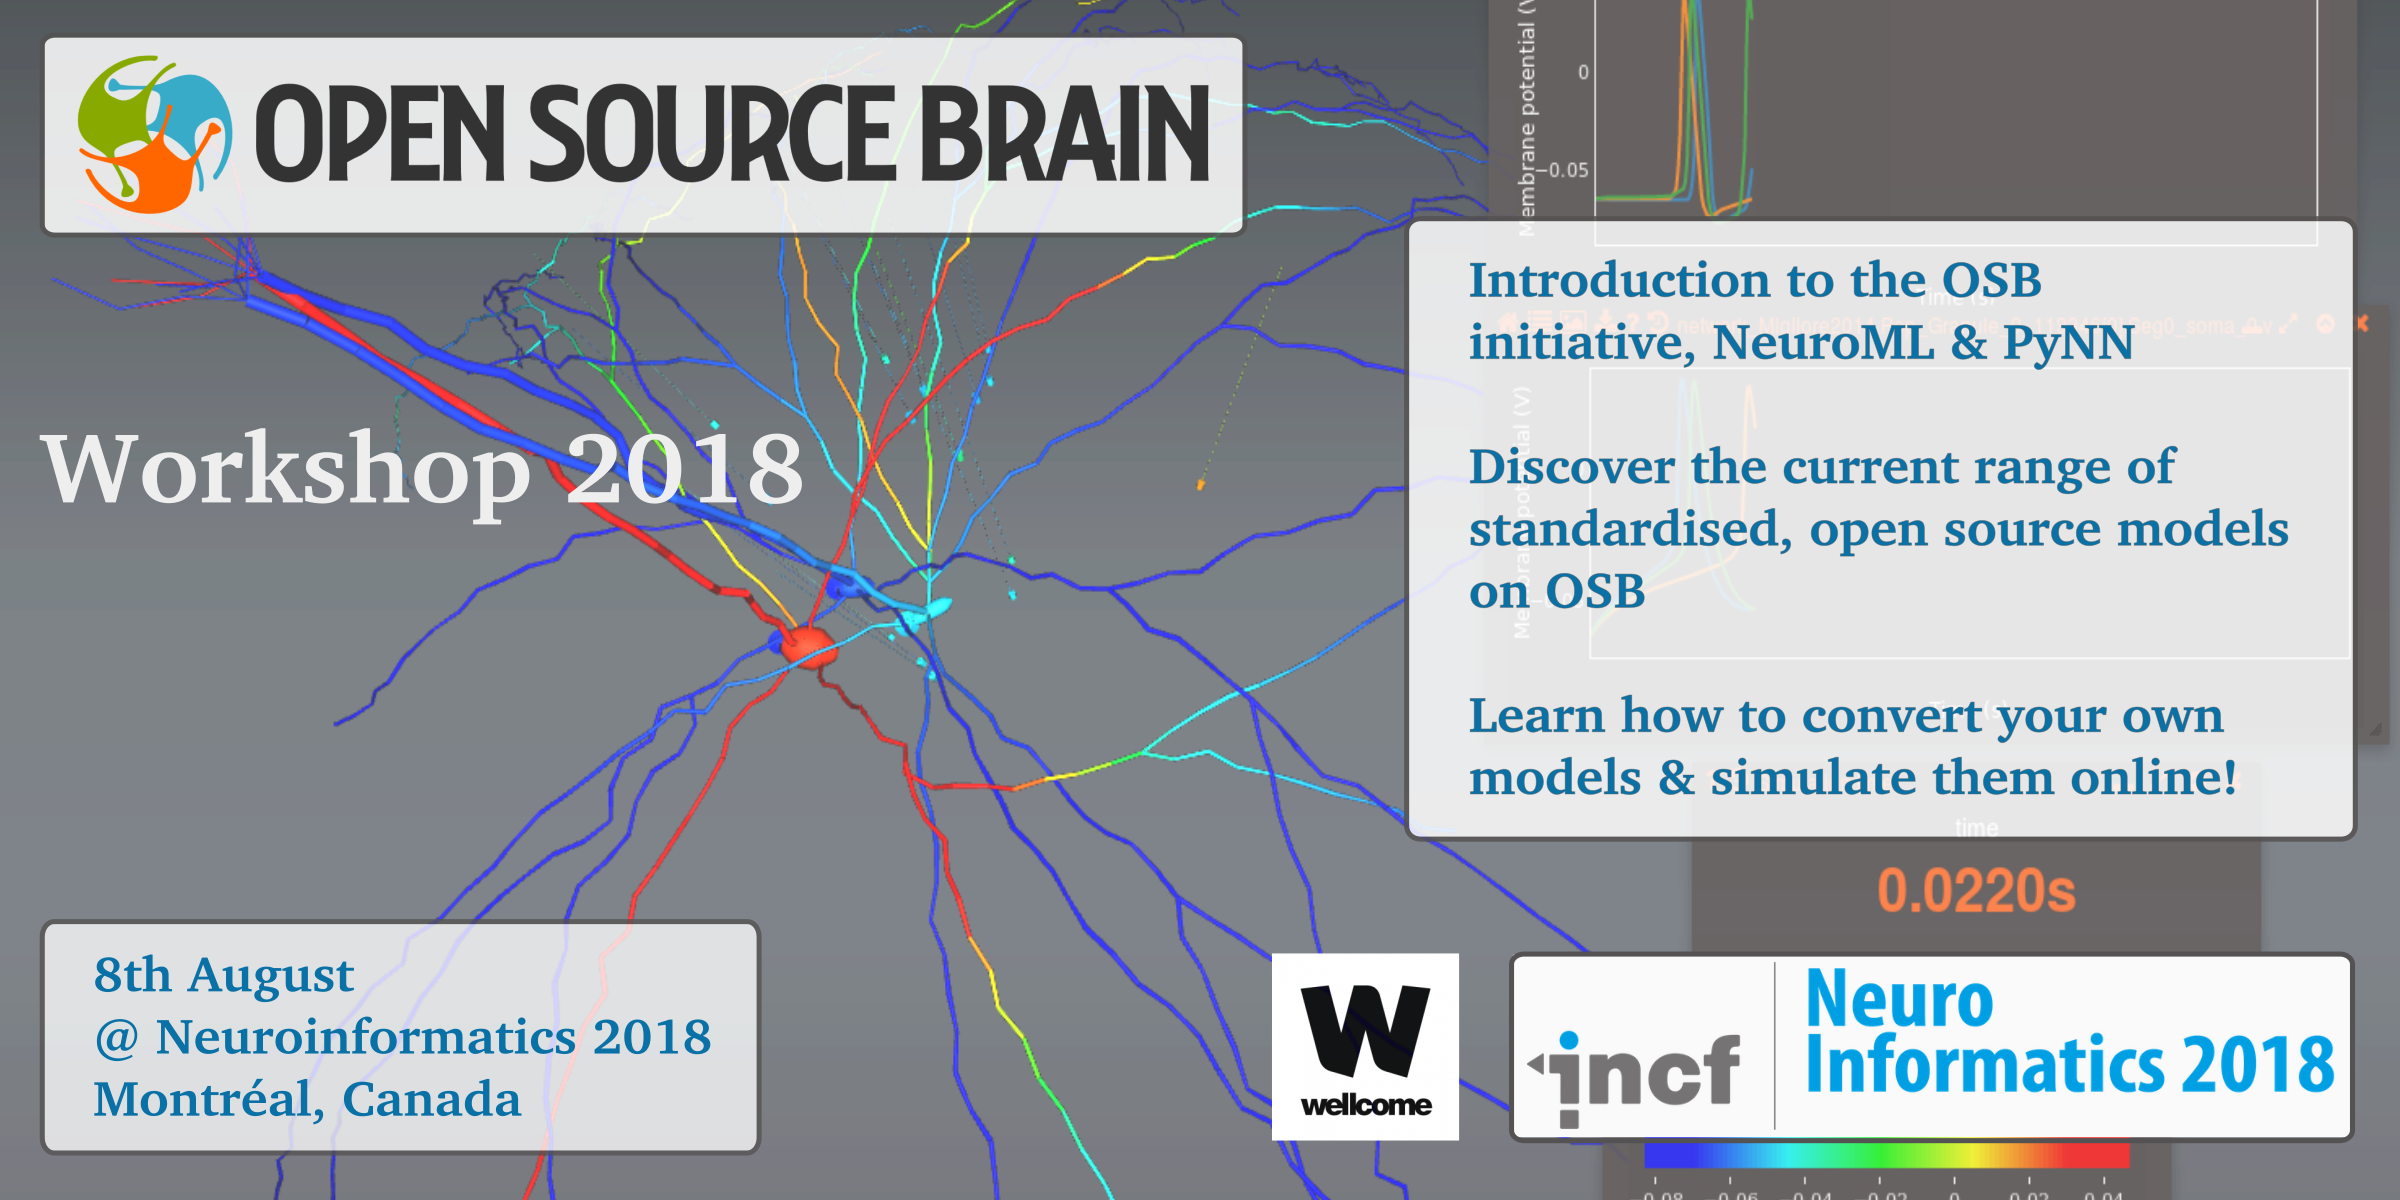
- A workshop on Open Source Brain at Neuroinformatics 2018 on Wed 8th August 2018 at McGill University, Montréal
- A tutorial on Neuroinformatics Resources for Computational Modellers, including OSB and related resources at CNS 2018 in Seattle
- A workshop on Developing, standardising and sharing large scale cortical network models at CNS 2018 in Seattle
- A tutorial on Neuroinformatics Resources for Computational Modellers, including OSB and related resources at CNS 2017 in Antwerp
- Collaborative Development of Data-Driven Models of Neural Systems: a conference at Janelia Research Campus in Sept 2016 organised by the OSB team.
- Open collaboration in computational neuroscience: a workshop at CNS 2015
- OSB 2015 in Sardinia in May 2015
- A workshop on Open collaboration in computational neuroscience at Neuroinformatics 2014 in Leiden in August 2014 featuring OSB
- OSB 2014 in Sardinia in May 2014
- Hackathon 2013 in London in Nov 2013
- Sardinia 2013 the OSB kickoff meeting in May 2013
Interaction With Other Neuroinformatics Resources
Note: OSB documentation has been moved! Please see latest documentation (covering both OSBv1 and OSBv2) at: https://docs.opensourcebrain.org
Below is a list of some important resources in the neuroinformatics, computational neuroscience and systems biology fields and how the Open Source Brian Repository is planning to interact with them.
ModelDB
ModelDB is a curated database of published models in computational neuroscience. This has been the primary source for most of the original simulator scripts on which the models in OSB are based. Where appropriate, OSB models will link back to the original published models on ModelDB.
Greater links are planned between these resources in the future to facilitate finding original model scripts (in a simulator specific format) and updated versions (in a standardized format) which have been extended/improved/used in other modeling studies.
NeuralEnsemble
 :
:NeuralEnsemble is an effort to coordinate a number of projects developing software for computational neuroscience to create an interoperable set of tools for addressing complex questions about neuronal function.
Many of the tools developed as part of the NeuralEnsemble initiative will be target applications for models developed on OSB.
NeuroLex & NIF

NeuroLex is the neuroscience lexicon. Many key elements in OSB models (cells, ion channels, brain regions) have unique entries in the NeuroLex lexicon, and this identifier can be used to identify the elements in OSB.
These references are currently used in many of the Theme Wiki pages (e.g. here) and will become more widely used for identifying cells, cellular elements, channels, etc. since neuroLexId is a new attribute in NeuroML v2.0 model elements (see example here).
See the NIF and NeuroLex Showcase project for more details.
BioModels
The BioModels database is a repository of peer-reviewed, published, computational models. We are working with the developers of this database to allow greater linking between models in these repositories.
This work is chiefly taking place in the framework of the COMBINE Network.
NeuroElectro
NeuroElectro is a structured database of information on the electrophysiological properties of neurons. This type of information will be very useful for comparing the electrical properties of model neurons with real experimental data.
An API to the NeuroElectro database will allow retrieval of this data and the SciUnit package will be used to create tests for models against these properties.
See the NeuroElectro & SciUnit Showcase project for more details.
Simulators
Note: OSB documentation has been moved! Please see latest documentation (covering both OSBv1 and OSBv2) at: https://docs.opensourcebrain.org
An overview of the main target simulators for models in OSB
Note: not all simulators will be able to execute all models. See here for more information on the simulators supported by each of the models on OSB.
For more tools (e.g. for visualization, analysis of models) which can handle the NeuroML elements of the models on OSB see here.
Brian
Brian is available for download here. There is a Brian Showcase project on OSB.
Greater native support for converting models in NeuroML to (and from) Brian is in development in NeuroML v2.0. See here.
Brian is also currently supported through conversion of NeuroML models to PyNN. See here.
GENESIS 2
GENESIS 2 is available for download here.
Support for running NeuroML models on GENESIS 2 is mainly enabled through generation of scripts by neuroConstruct, but see also here.
GENESIS 3/Neurospaces
GENESIS 3/Neurospaces are available here.
GENESIS 3 currently supports native reading of passive models in NeuroML format (morphology + passive parameters).
Participants at the recent Workshop on Multi-Scale Modeling in Computational Neuroscience with GENESIS 3 reported some success running neuroConstruct generated GENESIS 2 scripts on GENESIS 3.
MOOSE
MOOSE is available here.
Native support for NeuroML (version 1 & 2) in MOOSE is in active development, but neuroConstruct can also be used to generate MOOSE code from NeuroML models.
Follow the latest developments in MOOSE here.
Moogli is a sister project of MOOSE and is a simulator independent OpenGL based visualization tool for neural simulations.
NEURON
NEURON is available here. There is a NEURON showcase project on OSB.
There is native support for reading/writing NeuroML cells in NEURON, see here.
neuroConstruct can also be used to generate NEURON code (including Parallel NEURON) from NeuroML models.
NEST
NEST is available for download here.
NEST is currently supported through conversion of NeuroML models to PyNN. See here.
Greater native support for NEST is planned in NeuroML v2.0 (see here).
PSICS
PSICS is available here.
There is some native support for NeuroML in PSICS, but neuroConstruct can also be used to generate PSICS code from NeuroML models.
OSB API
Note: OSB documentation has been moved! Please see latest documentation (covering both OSBv1 and OSBv2) at: https://docs.opensourcebrain.org
API for OSB
An API for getting access to information contained in OSB projects has been developed.
See https://github.com/OpenSourceBrain/OSB_API.
REST API
This is based on the REST API which was developed for Redmine, the framework on which OSB is based.
An example of the data returned by this REST API for each project on OSB can be see here: http://www.opensourcebrain.org/projects/thalamocortical.xml.
Python API
A Python module (osb) has been developed which uses this REST API and allows scripts to be developed which use the information retrieved about OSB projects.
A simple example of usage is shown below:
import osb

for project in osb.get_projects(min_curation_level="Low"):

    print "Project: %s has tags: %s" % (project.name, project.tags)
and more examples can be found here.
Converting To NeuroML2
Note: OSB documentation has been moved! Please see latest documentation (covering both OSBv1 and OSBv2) at: https://docs.opensourcebrain.org
Why should you convert your model to NeuroML 2?
Converting models to the simulator independent format NeuroML 2 enables conversion of the model to many different formats, as well as enables many of the advanced features of OSB to be used with your model (e.g. 3D visualisation of cells & networks and extracting information on channel kinetics).
At the moment, there is no "magic button" to press in simulators to export your model into valid NeuroML 2. Presently the best approach is to look at some of the core examples of NeuroML 2, the OSB projects being converted to NeuroML 2, look at the XML examples there and start manual conversion of the models based on these.
There is a step by step guide: Converting conductance based cell models to NeuroML2 under development here!
There are some suggestions below for tools to use in this process.
Use jNeuroML to validate/execute/convert/view the NeuroML 2 files
jNeuroML can be used to validate NeuroML2 files:
jnml -validate MyNeuroML2.nml
This will validate the file against the latest XSD Schema document, as well as perfom a number of other checks on the structure of the model.
Creating a LEMS simulation file to specify how long to run the simulation, timestep, what to plot/save etc. allows the model to be run with jNeuroML. See examples here and most of these OSB projects have at least one LEMS simulation file too.
To quickly visualise cells and networks in NeuroML 2 (as opposed to loading them in neuroConstruct or viewing on OSB), models can be converted to SVG format (for viewing in a web browser etc.):
 jnml MyNeuron.cell.nml -svg
 jnml MyCircuit.net.nml -svg
Installing the latest development version from source as outlined here is highly recommended to get the latest features of jNeuroML.
Use pyNeuroML to export NeuroML2 morphologies from NEURON
Work in progress: pyNeuroML is a Python package which makes many of the features of jNeuroML accessible in Python scrips by bundling the jNeuroML jar file and using the functionality of that package.
In addition to jNeuroML features, pyNeuroML adds a number of Python specific features, including an updated exporter from NEURON into NeuroML2. This is currently limited to exporting just neuronal morphologies (see example here) but will be developed further to allow extraction of other features such as connectivity (and generation of templates in NeuroML2 for channels, synapses etc.).
This feature was used to extract a number of cell models from the original NEURON code in a 3D olfactory bulb model (see this script).
Use pyNeuroML to help convert channels to NeuroML 2
Another feature being worked on is a set of scripts to help conversion of ion channel models (e.g. in NEURON's NMODL format) to NeuroML 2. These scripts can be accessed after pyNeuroML is installed using:
pynml-channelanalysis NaConductance.channel.nml   # Analyse a NeuroML 2 channel
pynml-modchananalysis NaConductance               # Analyse a NEURON channel e.g. from NaConductance.mod
These scripts, while they take different approaches to generating the traces for activation/inactivation variables, produce comparable plots:
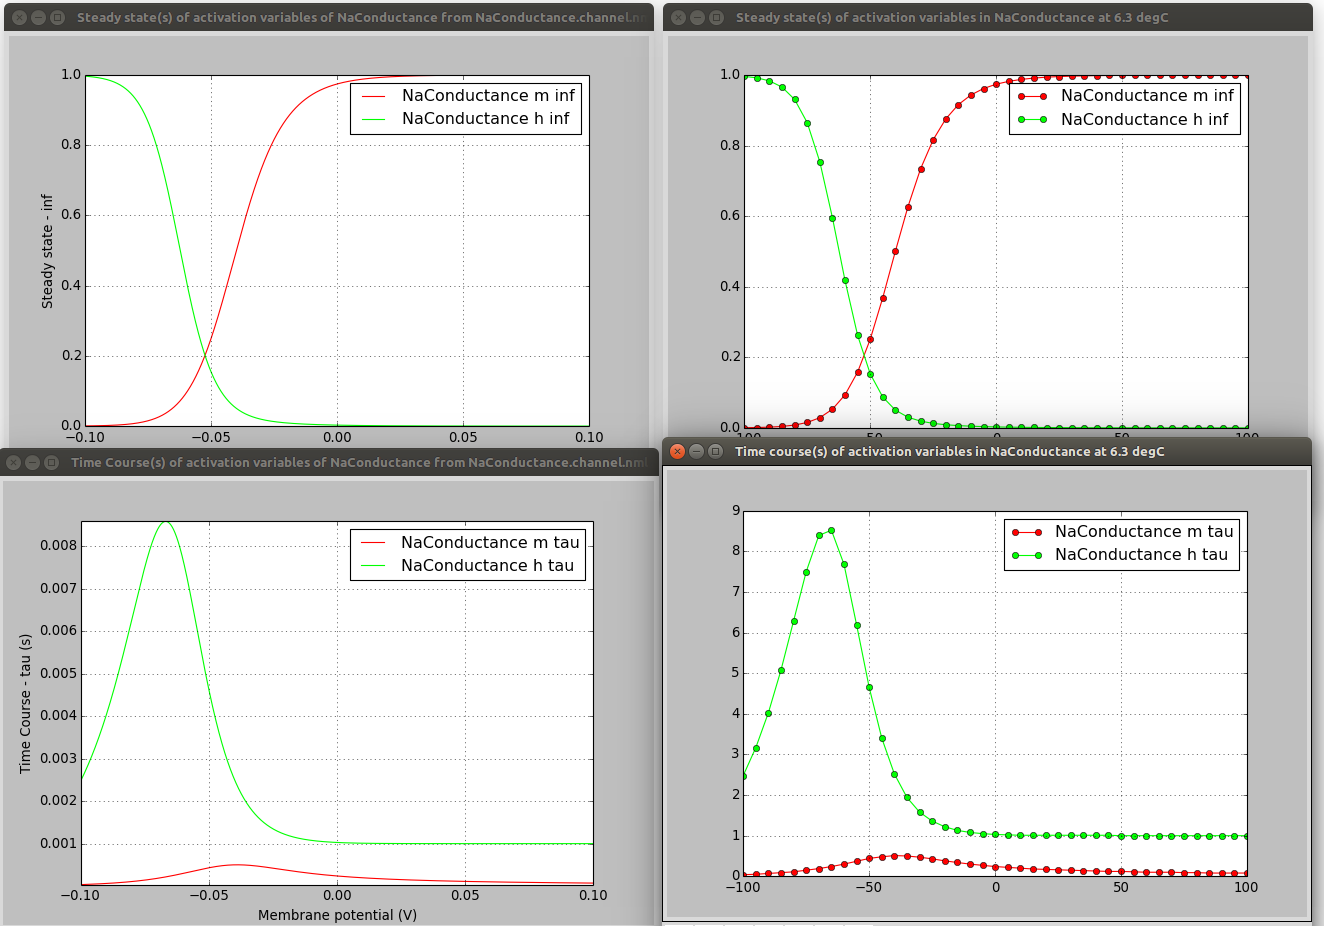
On the left are the plots produced from the NeuroML file (e.g. see here) and on the right from the NMODL version (see here).
To be clear, these scripts don't (currently) help you extract the equations from the NMODL file and put them in the correct place in the NeuroML file, they just help comparing the behaviour of the 2 channel formats to check for errors in a manual conversion.
Use neuroConstruct to help conversion to NeuroML v1/2
Many projects on OSB were originally converted from the original format (NEURON, GENESIS, etc.) to NeuroML v1.8.1 using neuroConstruct (see here for a list of these), and from there the conversion to NeuroML2 inside neuroConstruct was straightforward. More on using neuroConstruct here and details on conversion of models to NeuroML v1 here.
Contribute To OSB
Note: OSB documentation has been moved! Please see latest documentation (covering both OSBv1 and OSBv2) at: https://docs.opensourcebrain.org
There is a central repository for issues listing OSB projects looking for contributors. A number of other programming tasks (e.g. further development of NeuroML based tools) are also listed, which would be of benefit to OSB projects.
See https://github.com/OpenSourceBrain/Contribute/issues for the current issues/project suggestions.
A template for new issues/project suggestions can be found here.
This is also a place for labs who have a specific, well defined model building/conversion project (or tool development task), related to the aims of Open Source Brain, to advertise the project with the understanding that they would be willing to help the developer complete the task, and that the model/code will be open to all.
Running Simulations on OSB
Note: OSB documentation has been moved! Please see latest documentation (covering both OSBv1 and OSBv2) at: https://docs.opensourcebrain.org
It is possible to run simulations on OSB directly from your browser, without installing any additional software.
Introduction
To run simulations with a model, you must be logged in, and you must first save a local copy to your OSB workspace ("persist the model"). To do this click the Star icon:
Then open the Experiments tab at the bottom of the screen. A template experiment exists by default, and additional experiments may be added with the + button. Clicking on an experiment expands it to show more details.
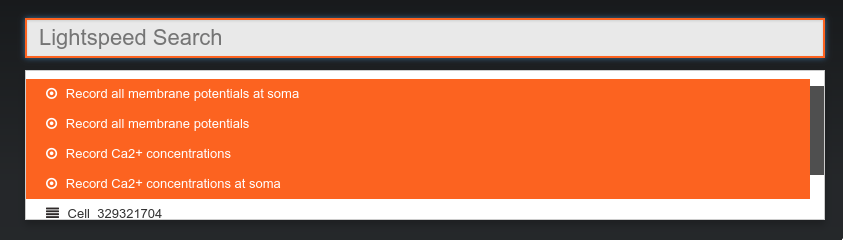
If you simply wish to record all membrane potentials, membrane potentials at the soma, or Ca2+ concentrations, hit the Run menu at the top of the screen and select Run Active Experiment.
After setting the parameters (see below for advice on simulators), hit Submit. If no variables have been selected you will be presented with shortcut options:
After choosing an option, you should see the status of your experiment change to queued (blue circle) and then to running (yellow circle). Experiments will continue to run if the browser is closed.
Finally the experiment status should change to completed (green circle) – you can then use the Results menu to plot recorded state variables, replay the simulation with coloured morphologies, etc.
For more fine grained control of state variable recording, parameter variation, and result plotting, the control panel is your friend. The control panel can be opened with the button in the left hand control panel. There are three primary views: Visual Objects, State Variables, and Parameters. For simulations we are interested in the latter two.
In the State Variables and Parameter views there are three basic filter levels. From right to left, you may view and plot results (State Variables) or view parameters from experiments in any of your projects (), or from any experiment in the current project (), or you may set which variables you wish to be recorded or change parameters for the current experiment (). In the latter filter you may also see what variables have been selected using the Please note: you can only set state variables or change parameters of an experiment when it is in DESIGN mode (orange circle). Experiments that have completed (green circle) cannot be modified, but you may clone them using the button in the Experiments tab.
For more information, see also the Geppetto Documentation.
Protocols
For models with a pulseGenerator, a batch of experiments for a range of amplitudes can be generated using the Add & Run Protocol option in the Run menu.
Supported simulators
Neuron on OSB, jNeuroML on OSB, and NetPyNE on OSB simulation options run on the OSB platform's own server. Limitations on the size and duration of simulations apply.
Neuron on NSG and NetPyNE on NSG run on the Neuroscience Gateway Portal. NetPyNE on NSG simulations can be run on up to 256 processors.
Connect to Dropbox
Simulation results in can be automatically sent to a Dropbox App folder, in HDF5 format.
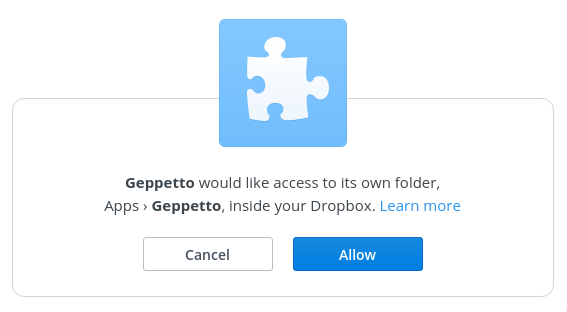
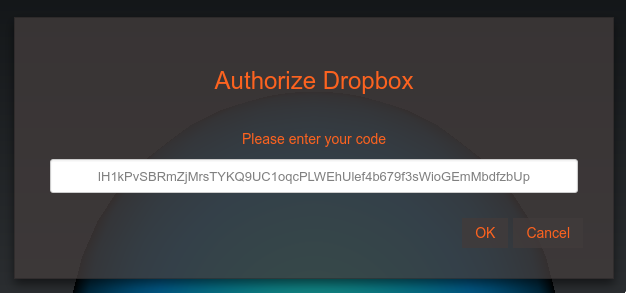
To enable this, click the "Link Dropbox…" button in the Run Experiment dialog.
You will be asked to give Geppetto access to its own folder within Dropbox. Copy and paste the code into the dialog on OSB.
After completing this configuration, the "Upload results to Dropbox on completion" option will be checked by default in the run dialog, and results files should appear automatically in your Apps/Geppetto folder.
Creating Tutorials
Note: OSB documentation has been moved! Please see latest documentation (covering both OSBv1 and OSBv2) at: https://docs.opensourcebrain.org
We encourage users to turn their OSB projects into new tutorials.
An example tutorial repository can be found here. We refer to this example below.
First, open the model you wish to use for a tutorial. There are two main components to building a tutorial: configuring the default session, and writing the main step-by-step guide.
Configuring the default session
Any changes made to the state of a project, such as open widgets, re-coloring of populations, zoom or model position etc. can be saved and reused as the default working environment for the tutorial.
For example, take a look at the Blue Brain Project Showcase session. Immediately you are greeted with three popup widgets, the model description, tutorial, and an info box. This is achieved simply by creating these windows in your original project (i.e. clicking "Model Description" and using the Console to add a popup widget, and then downloading the project using the  button in the top-right toolbar.
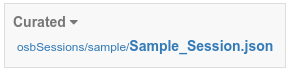
The project.zip file contains an xmi file, a json file, a js file, and the results of any experiments you have run. Place the contents of the zip in a subdirectory of your repo. Then a link to the json file will appear on the models page of your project on OSB:
If you wish to include a step-by-step tutorial component, ensure that you have the tutorial widget open as part of the default session state: you can open a tutorial widget by pressing the book icon in the left toolbar.
Writing a step-by-step guide
The main component of tutorials are plain html files, one per step, and a json file to tie them together, see here for an example.
To create interactive aspects, the quickExperiment javascript function can be used to add experiments with parameters set by the tutee, see here for an example. The json file should specify a name (tutorial title), default height and width of the tutorial widget, and a list of paths of the html files for each step, see here for an example.
Finally we need to add our tutorials to the tutorial widget by editing the json file downloaded in the step above (Configuring the default session). It may help to run this file through a formatter before editing. To the data field of the tutorial widget, add URLs pointing to the json file(s) that you created above (see here for an example). You may also wish to change the activeTutorial field under componentSpecific to the title of tutorial you wish to be initially displayed. Tutees may switch between tutorials using the book icon at the top-left corner of tutorial widget.
Existing tutorials
You can explore our existing tutorials here. The synaptic integration tutorial is still under development.
Support
Please get in contact at any stage of preparing your tutorial.
How To Contact Us
Note: OSB documentation has been moved! Please see latest documentation (covering both OSBv1 and OSBv2) at: https://docs.opensourcebrain.org
Get in touch
Please subscribe to the OSB announce mailing list for announcements and updates related to the Open Source Brain project.
You can e-mail us on the OSB discuss mailing list at osb-discuss@googlegroups.com any queries, suggestions, or feedback.
If you have trouble with your account, the administrators are reachable at info@opensourcebrain.org.
Report a bug / Request a feature
All Open Source Brain development happens openly on GitHub.
Please follow the repositories there to keep up with OSB development.
You can also report any issues you run into on the issue tracker there.
Follow us on Twitter at @OSBTeam
Please follow us on Twitter at @OSBTeam to keep up with updates also.